High-Quality Image Conversion to JAN Embroidery File Explained
Introduction: From Pixels to Stitches
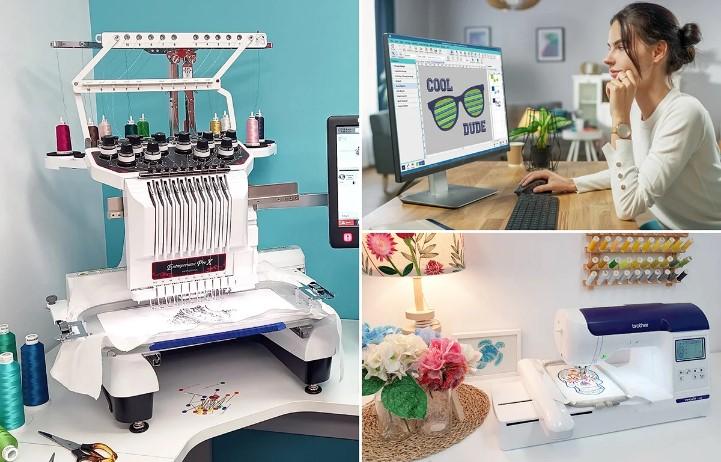
Have you ever looked at a beautiful logo or a favorite photo and thought, “I wish I could stitch this onto a jacket or a bag”? That dream becomes reality when you convert image to JAN Embroidery File. But let’s be real—it’s not as simple as hitting “save as.” Embroidery machines speak a different language than your computer or phone. Standard image formats like JPEG, PNG, or BMP are made of pixels. JAN files? They guide a needle through fabric, stitch by stitch. That’s a huge difference.
I remember my first attempt. I had a crisp PNG of a cartoon bird. I thought, “How hard can this be?” I loaded it into a cheap converter, and the machine started clunking like a broken toy. The bird came out looking like a blob with one eye. Frustrating, right? But after years of trial and error, I learned the secrets to high-quality conversion. This guide gives you those secrets in plain English—no tech jargon, no overhyped tricks.
So whether you’re a small business owner wanting embroidered merch, a hobbyist making gifts, or just curious, stick with me. You’ll learn exactly how to turn any digital image into a clean, professional JAN embroidery file.
What Exactly Is a JAN Embroidery File?
Let’s break it down. JAN is a file format used by certain embroidery machines, particularly Janome models. It contains stitch commands: where the needle goes, how far to move, when to change thread color, and even when to trim the thread. Think of it as a musical score for your machine. Each note is a stitch.
Other formats exist—DST, PES, EXP—but JAN is widely supported and reliable. The key difference from a regular image? A JAN file doesn’t care about pixels. It cares about density, stitch direction, underlay, and pull compensation. Without these, your design will pucker, gap, or tear the fabric.
Why Most Image Conversions Fail
You’ve probably seen those “auto-converter” websites. Upload a JPG, download an embroidery file in ten seconds. Sounds magical. It’s also a disaster.
These tools ignore fabric type, thread thickness, and design complexity. An image with smooth gradients? The converter will try to stitch every shade, resulting in a tangled mess. Thin lines? They’ll vanish because the machine can’t stitch thinner than a thread’s width. Tiny text? Unreadable.
The truth is, high-quality conversion needs a human eye and a specialized software like Wilcom, Hatch, or Ink/Stitch (that’s free, by the way). You don’t need to be a graphic designer, but you do need to understand a few basics.
Step-by-Step: How I Convert an Image to JAN File
I’ll walk you through my exact workflow. This works for logos, clip art, line drawings, and even photos (with some caveats).
Step 1: Choose the Right Source Image
Start with a clean, high-contrast image. Vector formats like SVG or AI are best because they scale without losing quality. If you only have a raster image (JPEG, PNG), make sure it’s at least 300 DPI. Avoid gradients, shadows, and tiny details. An image that looks great on screen often fails on fabric because fabric is coarse and thread is thick.
For example, a solid black cat silhouette will convert beautifully. A photo of a fluffy kitten with gray fur? That’s a nightmare. You’ll need to simplify it manually.
Step 2: Import and Trace
Open your embroidery digitizing software. Import the image and use the auto-trace tool to convert shapes into vector outlines. But don’t trust the auto-trace completely. Zoom in. Clean up stray points, smooth jagged lines, and remove overlapping paths. This step alone separates amateur work from pro-level results.
Step 3: Assign Stitch Types
Now the real magic happens. You choose which parts of the design use which stitch:
-
Satin stitches for borders, text, and thin shapes (they create a shiny, raised edge).
-
Tatami stitches for filling large areas (like a solid background).
-
Run stitches for fine lines and details.
For a simple logo, you might use satin for the lettering and tatami for a filled circle behind it. For a floral design, mix satin petals and tatami leaves.
Step 4: Adjust Density and Angle
This is where beginners mess up. Too many stitches close together will make fabric pucker or even break needles. Too few stitches leave gaps showing the fabric underneath. A good rule of thumb: for medium weight cotton, set tatami density to around 0.4mm spacing. Reduce density for stretchy fabrics like knits.
Also change the stitch angle for each region. If all stitches run the same direction, the design looks flat. Angling the fill in different parts creates texture and stops the fabric from pulling unevenly.
Step 5: Add Underlay and Pull Compensation
Underlay is a skeleton of stitches sewn before the top layer. It stabilizes the fabric and prevents shifting. Always add a center run or zigzag underlay for large filled areas.
Pull compensation is another hidden gem. As the machine sews, thread tension pulls the fabric inward. Without compensation, your nice circle will sew as an oval. So you slightly stretch the shape in software to counteract this. Typically 0.2mm to 0.5mm, depending on fabric.
Step 6: Save as JAN and Test
Export your design as a JAN file. Then—and this is critical—run a test stitch on the same fabric you’ll use for the final project. Don’t test on scrap cotton if the real thing is denim. Denim is thick and stiff; cotton is light. The results will be wildly different.
Common Mistakes and How to Avoid Them
Mistake 1: Ignoring minimum stitch length. Stitches shorter than 0.4mm can cause thread shredding. Always check for tiny stitches and delete or merge them.
Mistake 2: Using too many color changes. Each color change means the machine stops, cuts thread, and moves to a new position. It adds minutes to the sew time and increases wear. Combine small same-color areas when possible.
Mistake 3: Forgetting about fabric nap. Towels, velvet, and fleece have a fuzzy surface. Stitches sink into the nap, so your design looks thinner than intended. Widen satin columns by 0.3mm to compensate.
Tools I Recommend
For paid software: Hatch Embroidery (user-friendly for beginners) or Wilcom (industry standard). For free: Ink/Stitch, which runs inside Inkscape. It has a steep learning curve but produces excellent JAN files once you master it. Avoid free online converters unless you’re making a tiny test patch that you don’t care about.
Conclusion: Practice Beats Perfection
Converting an image to a JAN embroidery file is part art, part science, and part patience. No software spits out a perfect file automatically. You need to trace, assign stitches, adjust density, and test. But the reward is huge. Once you get that first clean logo sewn onto a hat or a photo-realistic landscape turned into a stitch portrait, you’ll feel like a wizard.
Start with simple, bold images. Use Ink/Stitch or a free trial of Hatch. Do test runs on scrap fabric. And don’t be afraid to fail—every puckered mess teaches you more than a perfect auto-conversion ever will.
Now grab that image you’ve been staring at, and turn it into stitches that people can touch and admire. Your embroidery machine is waiting.